Add a Camera
Once you have created your project, go to the Project section and click on Cameras. Here you can add all the cameras that will be used by the vision application. Each camera will appear as a separate tab.
To add a camera click on the add button in the top right corner and the next dialog will appear:
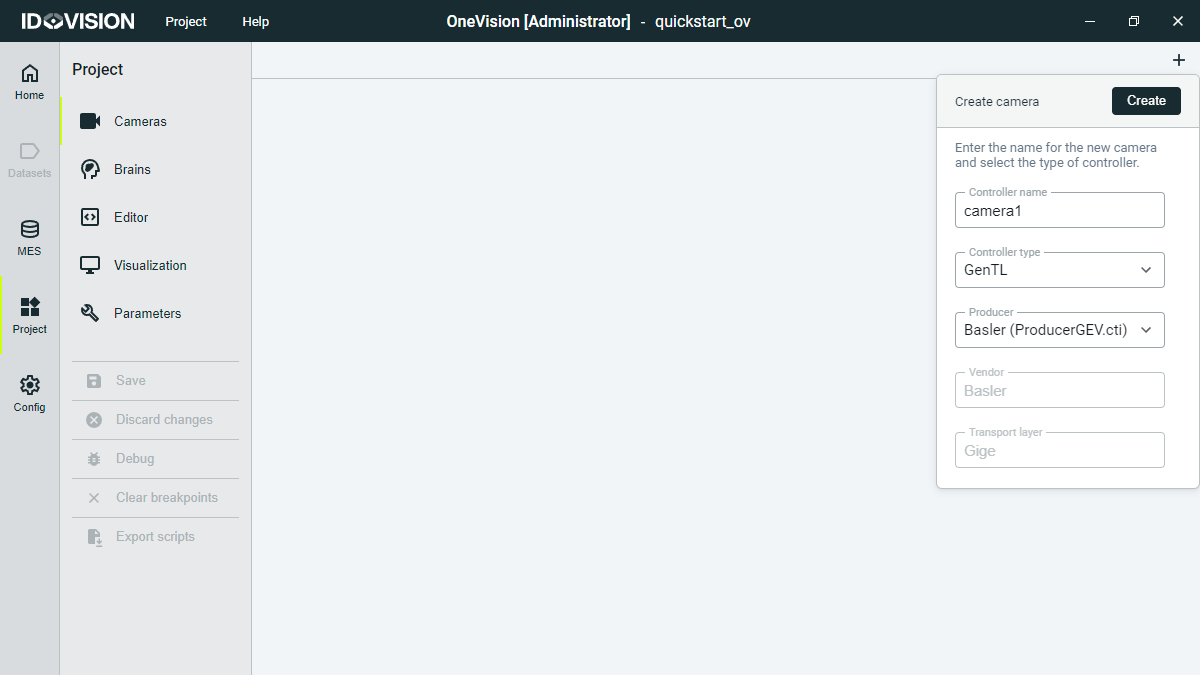
You can add a virtual or emulation camera selecting Emulation in the Controller type selector of the dialog.
Click Create and you will see a new tab for your camera. Under the camera icon, the camera status is shown. After creating a new camera that status will show Not initialized.
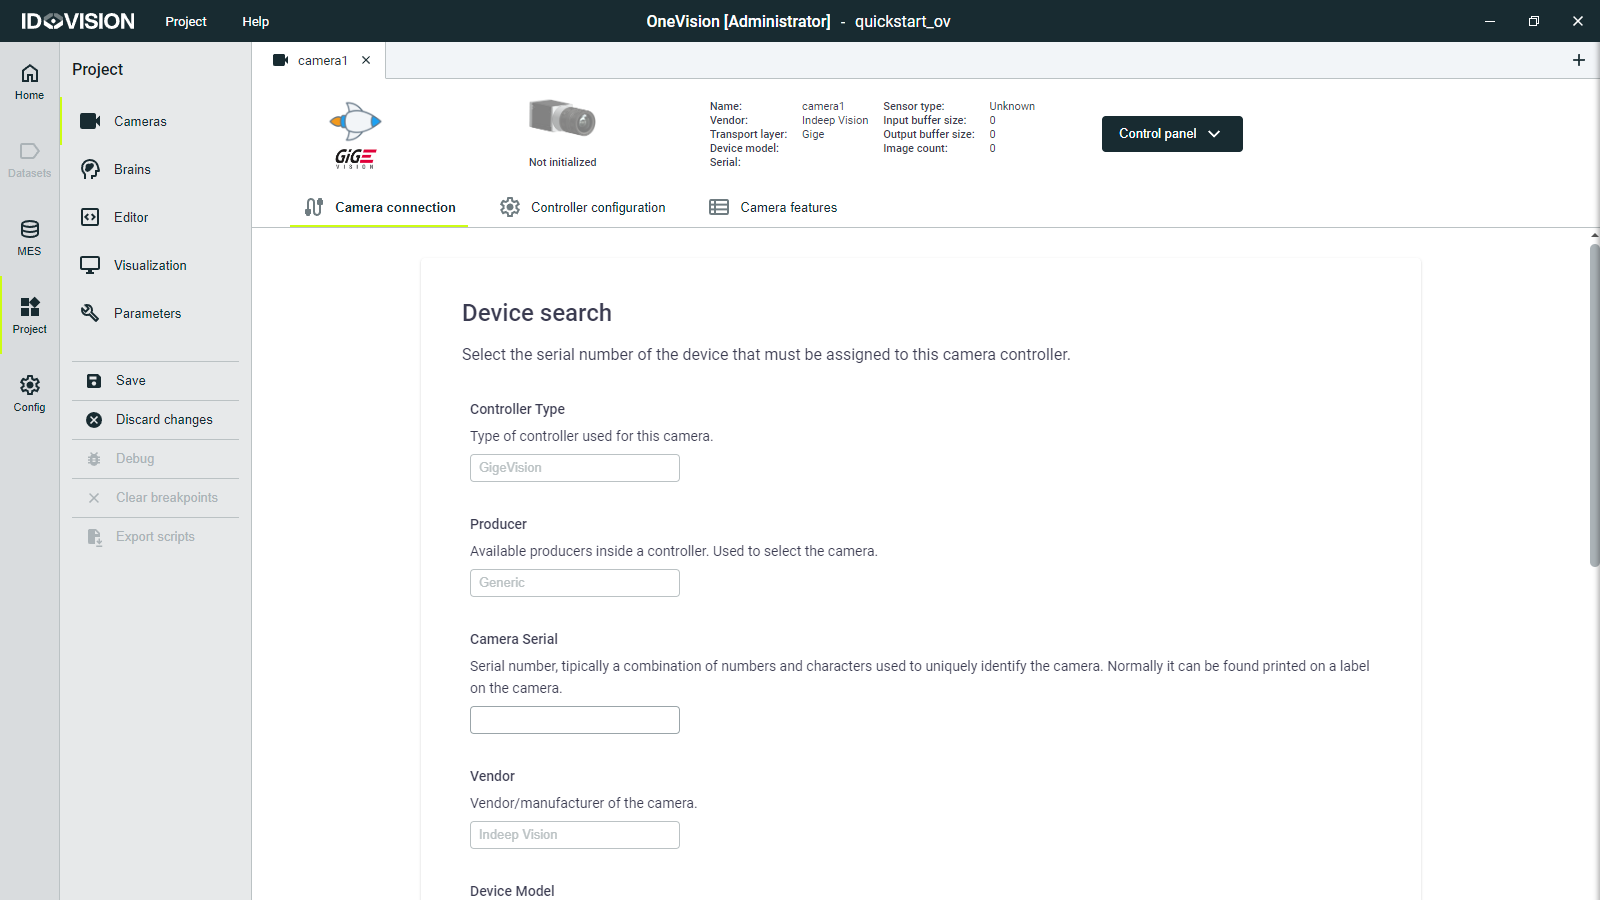
Now you can try to save the changes clicking on Save in the left menu. This will save the current changes to the project file. Click Discard changes if you want to discard the changes made to the project. After saving, the emulation camera status will change from Not initialized to Configuration error. This is because we have not yet configured the camera.
To configure the camera add the serial number at the Camera connection subtab. If you wish, you can change the configuration parameters at the Controller configuration subtab.
Click on Save in the left menu, and the camera status will change to Connected.
Now you can access the Camera features subtab, where you can change the features of the camera as if you were using the camera provider software.
The camera features changed in the Camera features tab will not be saved with the project. To save them, you must initialize the parameters by code, which will be explained later at the Writing Code section.
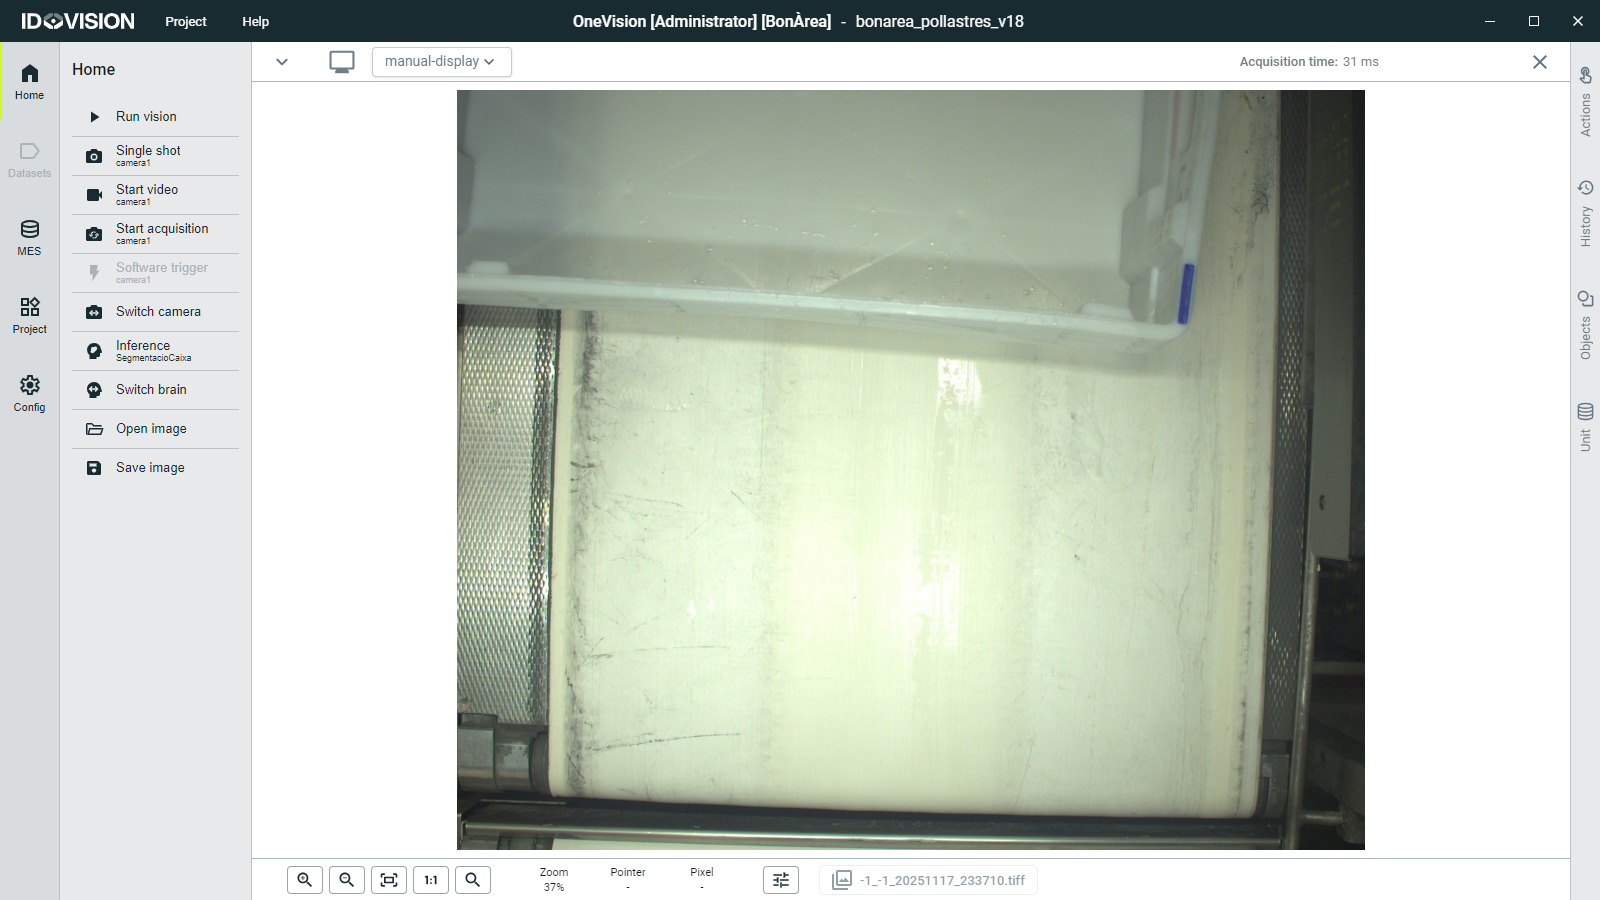
Trigger the camera
If you go to the Home section you will be able to manually trigger the camera and see the images captured by it.
At the left menu you will see the actions available:
- Single shot: Force the capture of a single image by the camera.
- Start video: Force the start of a video stream from the camera.
- Start acquisition: Start the normal acquisition of images from the camera.
- Software trigger: Sends a software trigger to the camera if it supports it (Only enabled if the camera is in acquisition mode).
- Switch camera: Switch between the different cameras in the project.