Image Display
The image display in OneVision provides an advanced interface for detailed image analysis and manipulation. You can enter the image display in two ways:
- Double-Click on a display element: In the Production View, double-click on a Display Element to open it in the image display.
- Manual camera operation: Perform a manual camera operation such as a single shot, start video, start acquisition, or open image. This will open the image display.
The image display consists of the following key areas:
Topbar
The topbar in the Image display displays global information related to the current image analysis session. It allows you to customize its appearance by adjusting colors, modifying displayed text, and adding additional properties. When properties are added, the topbar functions as a dropdown menu, enabling access to specific details related to the analysis.

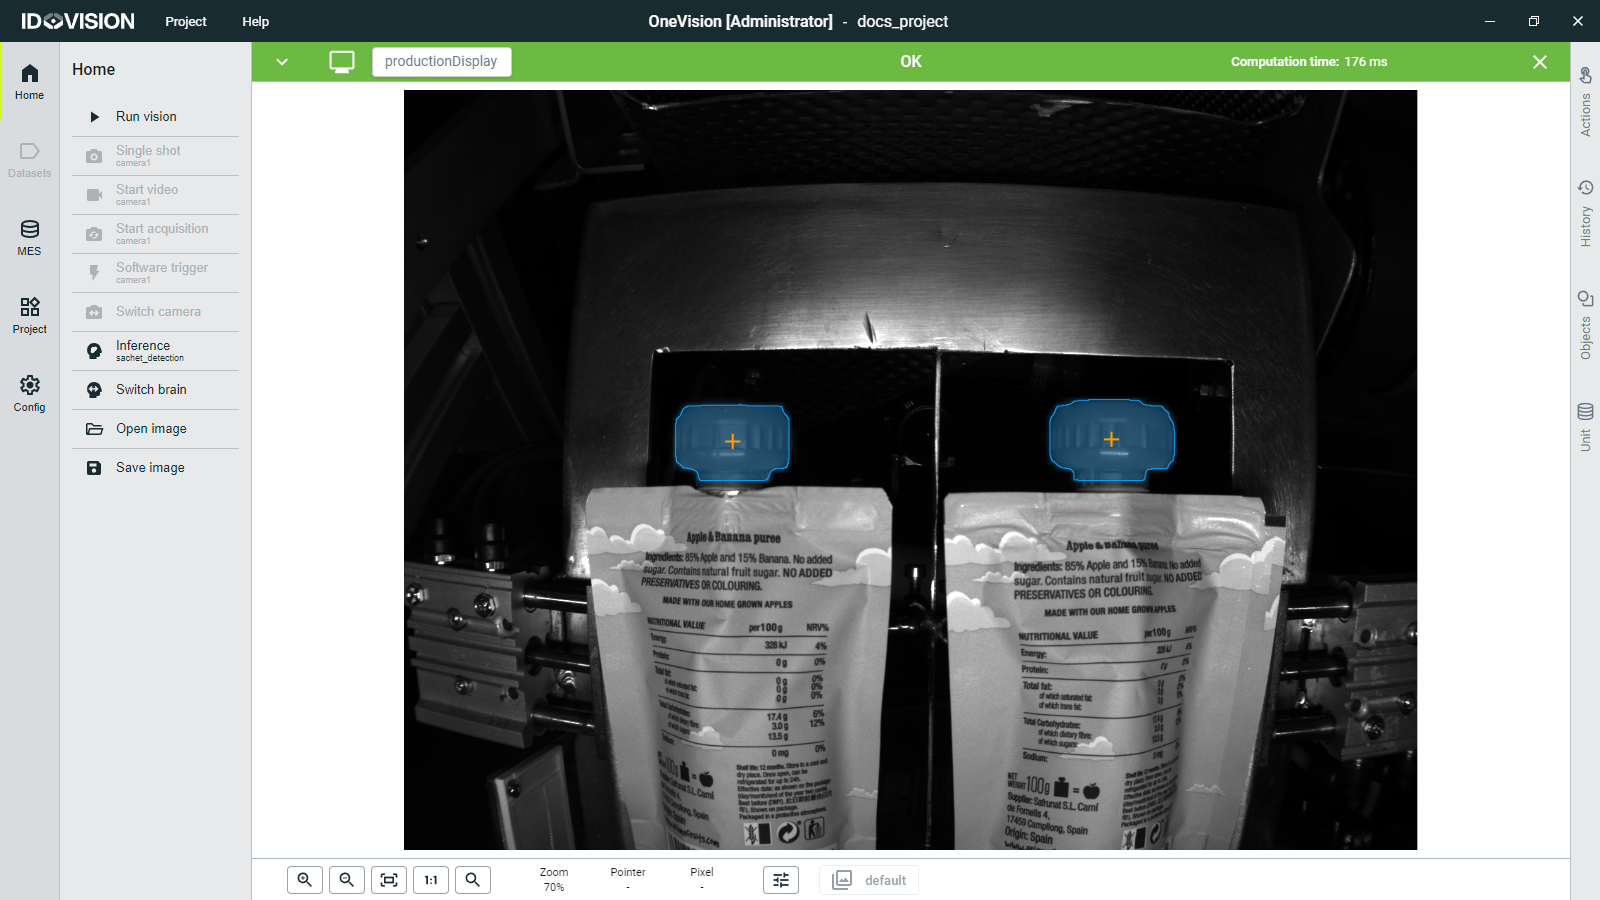
Image display
The image display serves as the central workspace where images or video frames are presented for detailed analysis. Here you can interact with the displayed content in the following ways:
- Zoom: Adjust the magnification level using
Ctrl + mouse scroll. - Pan: Navigate within the image by dragging with the mouse.
- Interactive Vision Elements: Click on elements like rectangles, polygons, points, and lines painted over the image to interact with them. These elements are results of the post-processing done on the image.
- Navigate through the entries: You can go to the next image display entry or the previous one with the right and left keyboard arrows.
Display tools
The display tools are located in a toolbar below the image display area, containing essential tools designed for image analysis and navigation:

- Zoom In/Out: Adjust the zoom level incrementally.
- Set to 1:1: Reset the image display to its original size.
- Zoom percentage: Displays the current zoom level for reference.
- Pointer position: Indicates the coordinates of the cursor within the image.
- Pixel value: Provides detailed information about the pixel under the cursor, such as color value or intensity.
- Display configuration: Customize display settings, including color mapping and overlay options.
- Capture selector: Select and capture specific image areas or regions for further analysis or documentation.
History
On the right side of the screen you have the History button. This action will show you the last captures shown on the display.
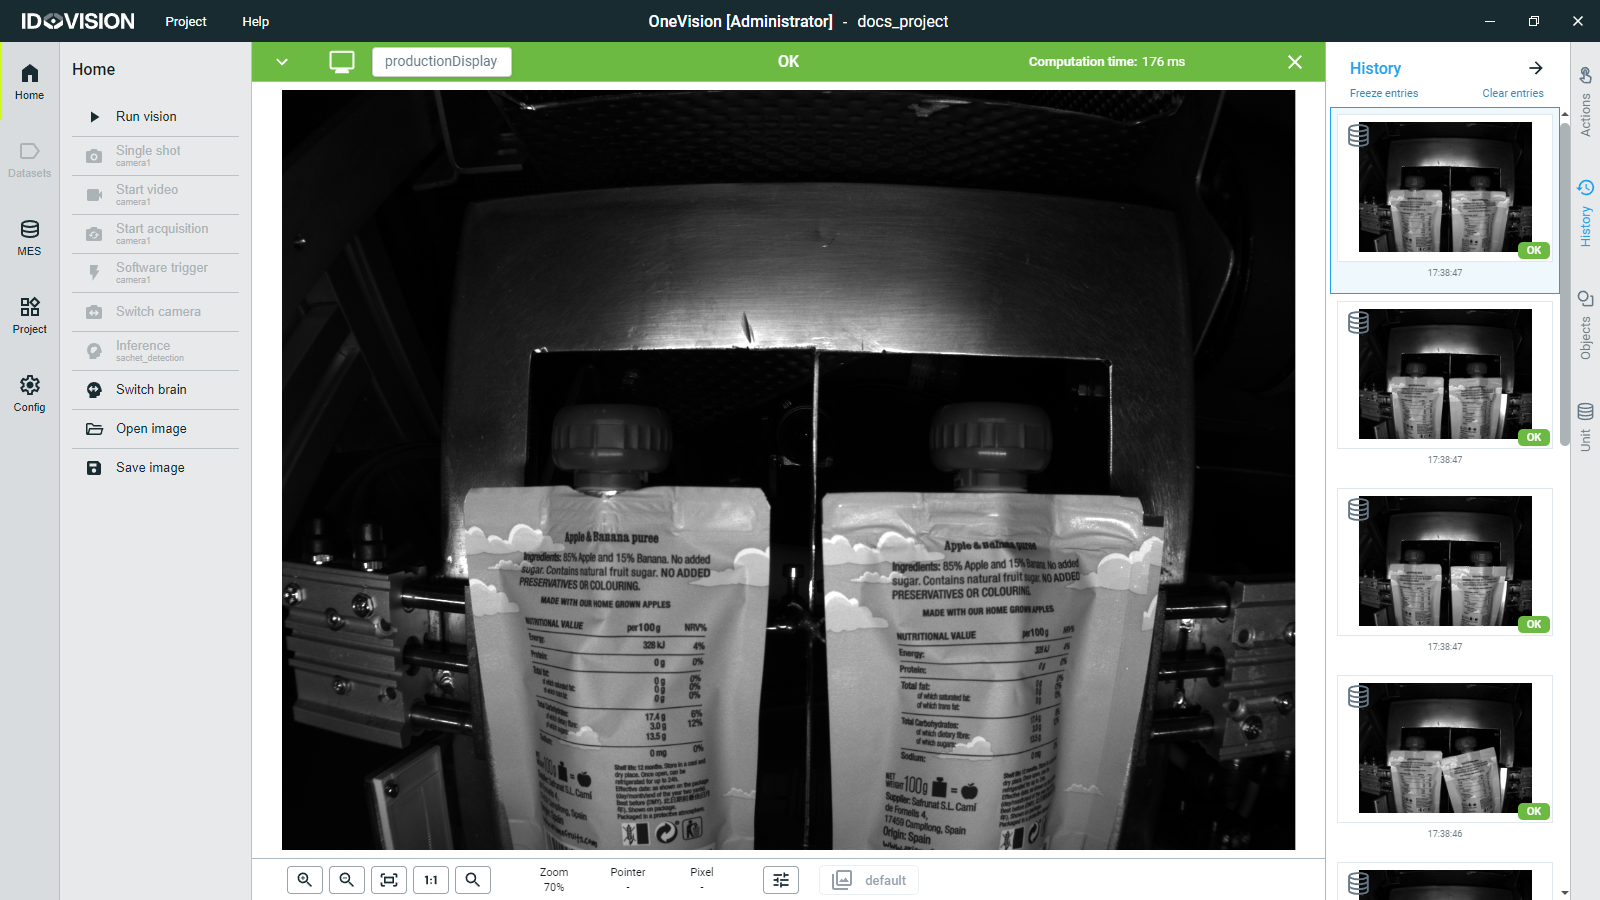
If the scripts are running and the display is updating you may not be able to analyze the captures properly. To avoid that you can click Freeze entries to stop updating the display.
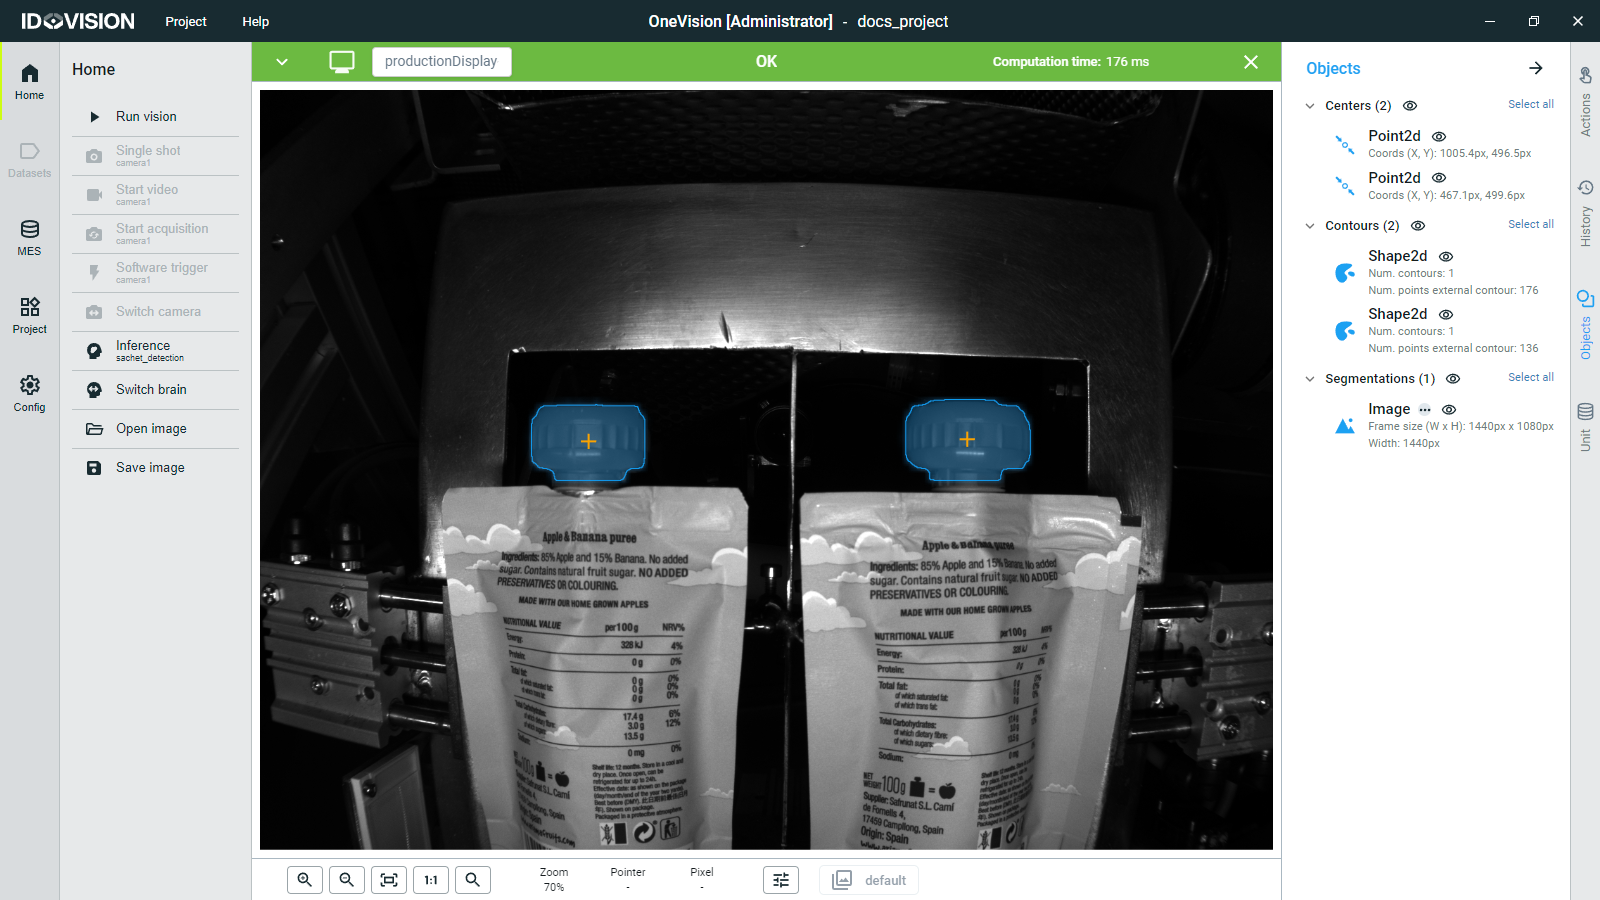
Objects
By clicking the Objects button on the right side of the screen, you can view the different objects or Vision Elements that were added to the image during processing. As shown in the next figure, you can also add categories to keep them organized.
The Vision Elements are the objects used in OneVision to process images and display the information extracted from them. Some examples of these Vision Elements include points, lines, rectangles, shapes, paths, and strings.
You can add them to an image by creating a Capture.
To hide an element or an entire category, click the eye icon next to it.
Units
In OneVision, you can send to a display or open in the image display two types of elements: Captures and Units.
- A Capture is an image where you can add Vision Elements.
- A Unit is an element that can contain one or more Captures (in theory all the Captures of the same product) and additional variables called Unit Results or simply Results. These Results must be defined in the Editor subsection within the Project section. Read more
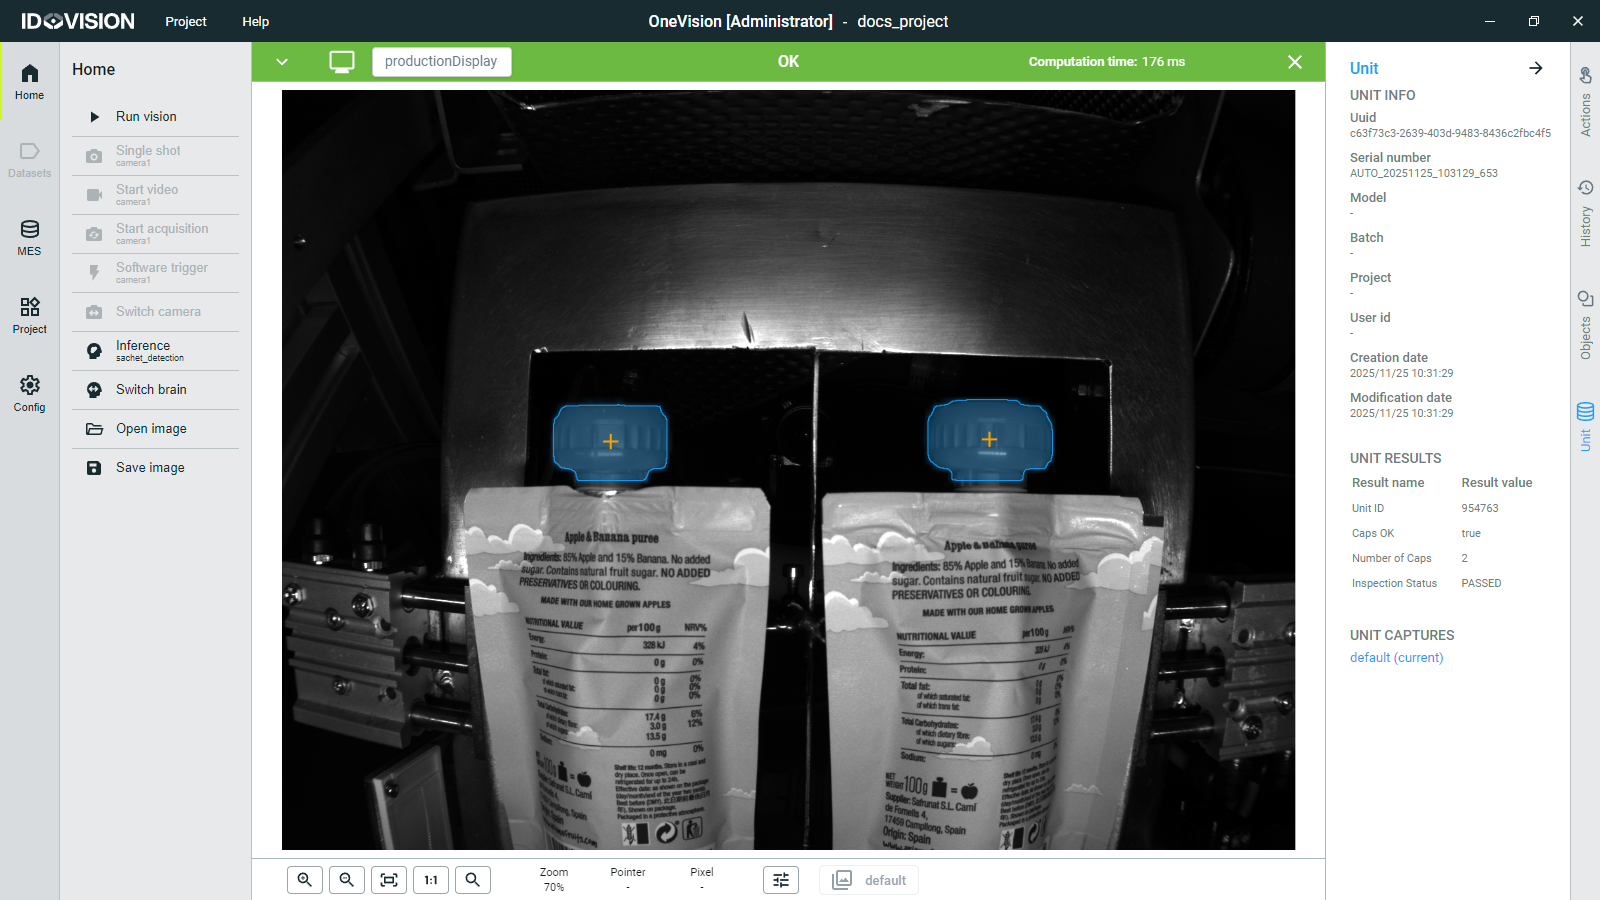
When a Unit is opened in the image display, the Unit button on the right side of the screen becomes visible. By clicking it, you can view detailed information about the Unit:
- Unit information shows information automatically generated by the software.
- Unit Results displays the Results you defined when writing the code.
- Unit Captures lists the different captures included in the Unit.
If the Unit contains more than one Capture, you can switch between them using the Capture Selector in the image display toolbar or by using the up and down arrow keys on the keyboard.