Configure Camera
Once your camera controller is created, a tab for the camera will appear. It will have three subtabs:
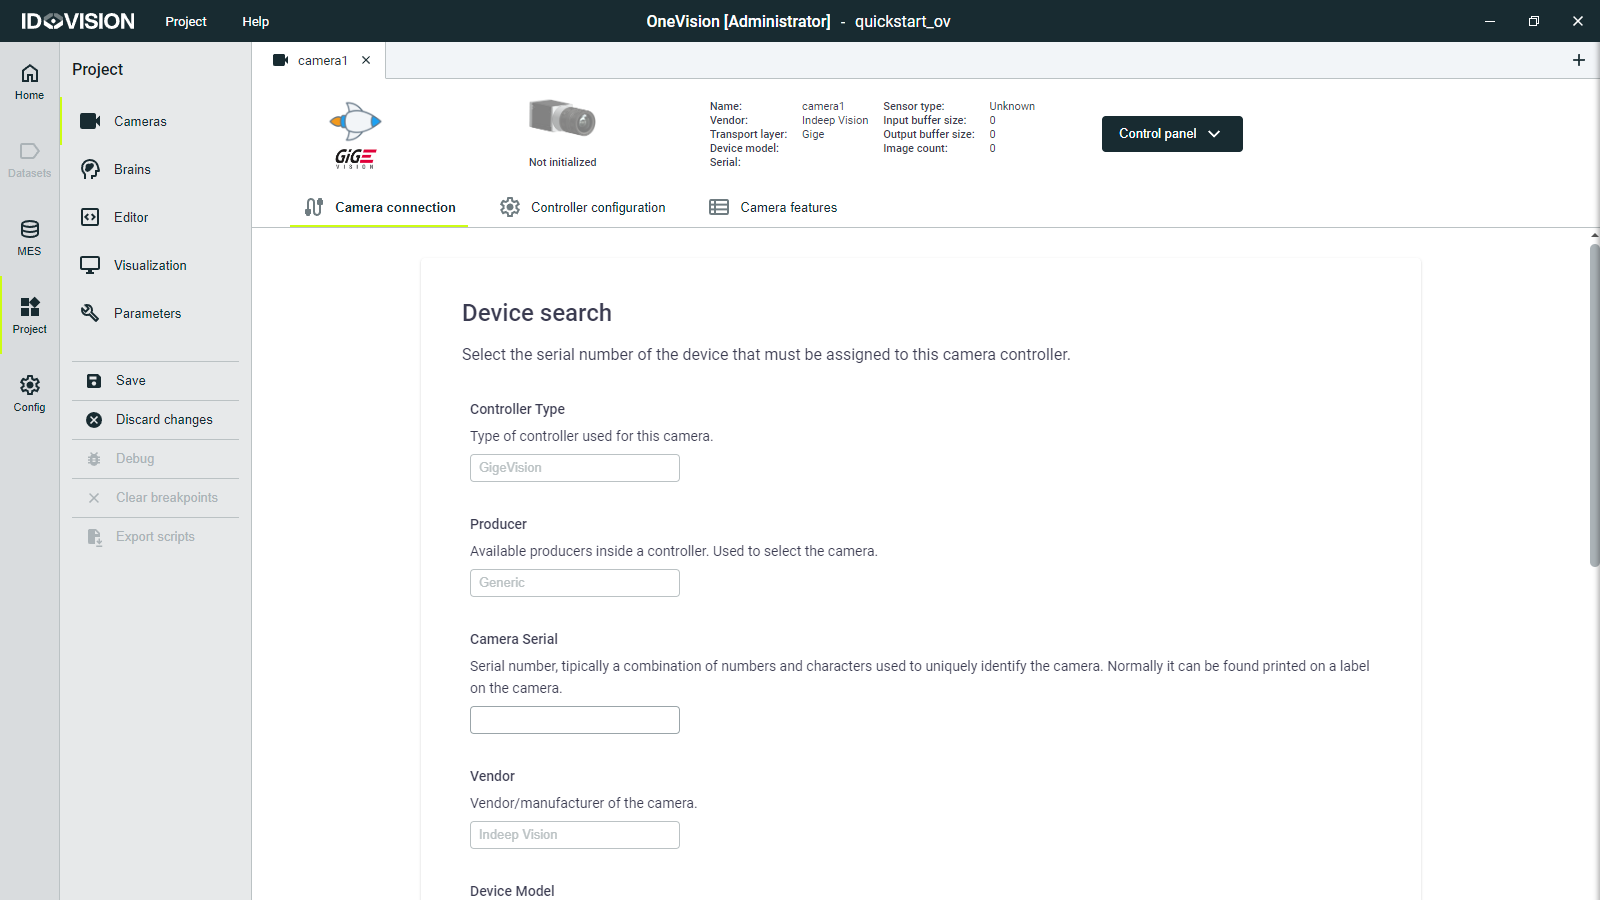
Camera connection
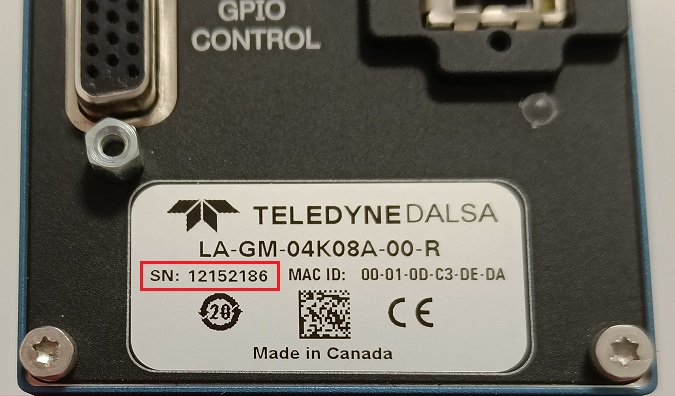
Here you must enter the serial number of the camera to connect to it. If everything is correct, the camera status will change from Not initialized to Connected.
In this tab, you can also review the controller features that were selected when adding a camera.
Controller configuration
Here you can change the following parameters:
- Friendly name: Re-name the camera.
- Camera connection: Enables and disables the camera.
- Critical: Sets the camera as critical. If a critical resource is used by the runtime and it stops or disconnects, the runtime will immediately stop.
- Component: Select a component of the camera. Only used in multipart cameras.
- Pixel format: Final output pixel format of the selected component. The final pixel format of the images captured.
- Rotation: Rotates the captured image by software.
- Flip: Flips the captured image by software.
- Image buffer size: Sets the size of the image buffer.
- Buffer auto-release: Automatically releases the oldest image to maintain two free buffers in the input buffer queue.
- Log level: Sets the desired log level for the internal logs of the camera controller. It can also be changed in the Settings section.
Camera features
In this part of the configuration you can visualize all the user features that the camera supports. You can also change the value of the features but the values will not persist if the camera is restarted.
The features are normally grouped by categories, which are shown in the left-side panel. The categories are defined by the camera manufacturer, and they are not necessarily the same for all cameras, although GeniCam compliant cameras follow the EMVA's Standard Feature Naming Convention (SFNC).
The camera features changed here will not be saved with the project. To save them, you must initialize the parameters by code.